How to make a fir branch from paper. Pine branch with corrugated paper cones
The New Year is just around the corner, and if you like to constantly make things and you want to make your home more comfortable for the upcoming New Year holidays, and at the same time surprise your loved ones and friends with something special, then this master class is just what you need!
For work we will need:
- corrugated paper in green and brown colors;
- scissors;
- hard wire;
- thin wire;
- glue stick.

Take a roll of green corrugated paper, measure out a length of about 6-7 cm and, without unrolling the roll, cut it off. 
We straighten the piece into a ribbon and cut it into 4 parts. Cut each part into noodles (1 cm wide), without cutting about 1-2 centimeters to the end. 

We carefully twist the cut ends with our fingers and get thin pine needles. 

At the output we have 4 tapes with needles. The number of pine branches you plan to make is the same number of ribbons there should be. 
We fold rigid wire, which can be purchased at stores that sell materials for decorating flower bouquets, in half. 
We begin to gradually wind the ribbon with needles around it. During the winding process, we try to straighten the needles and do not wrap them around the wire rod. 


At the end, we wrap the tail of the paper tightly and glue it with glue - a pencil. Please note that when working with corrugated paper, it is best to use glue - a pencil, as it does not allow the paper to get wet. 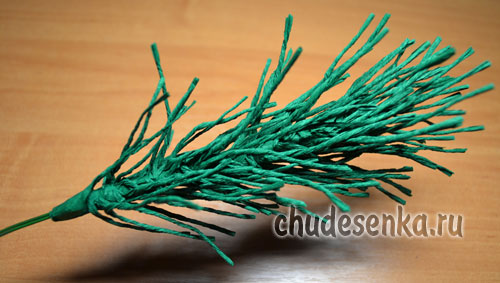
We wrap the stem of the branch, which has no needles, with corrugated paper of the same color as the needles. For our composition we made 4 pine branches. 
And now it’s time to deal with the cones. I’ll say right away that making them turned out to be not so easy, although in principle there is nothing complicated about it. Again, cut off a piece of approximately 5 cm from the unrolled roll of brown corrugated paper.

We bend one edge evenly. 
Next, bend the upper right corner into a triangle 2 times. 

Bend the right side of the folded corner halfway, holding the left side. On the left side we again make a fold twice and a lapel. 

You just need to do it carefully so as not to tear the paper. We make such bends along the entire length of the segment. 
Now we will twist the segments into cones. We take the first finished piece of paper and begin to twist it in a circle, overlaying the pattern one under one. 

We secure the bottom of the cone with thin wire. 

Next, we attach the finished cone to a rigid wire, which we wrap with green corrugated paper. 

You can immediately wind the piece onto a wire bent in half, just like we did the twigs. This option is more convenient.
And finally, we collect the finished twigs and cones into one whole, and carefully wrap the composition so that it does not fall apart with corrugated paper.

The pine branch with cones is ready! We put our coniferous bouquet in a cute vase and admire the results of our labor! If desired, it can be decorated with small Christmas tree decorations, serpentine, rain, etc.


The undeniable advantage of this pine twig is that, unlike a real one, it will not fall off and will be able to please the eye right up until the next New Year! Happy holidays to all! Good luck and implement new ideas in the New Year!
Irina Demchenko
Сhudesenka.ru
Making New Year's toys with your own hands is useful not only because you get an exclusive thing that no one else has, but also because while making New Year's toys you feel the holiday feeling, your mood improves, your brain and psyche rest - this is also a good therapy against fatigue and stress that so often haunt us at work, especially at the end of the year.
We invite you to create a beautiful and unusual New Year's craft from corrugated paper - a fir branch. Such a spruce branch will not crumble or turn yellow, and it looks just like a real one. So, let's begin.
Christmas craft made from corrugated paper “Fir Branch”
In order to make this fir branch from corrugated paper, you will need paper of 3 colors: green for the branch itself, brown for the cones and blue, cyan, yellow or any other for the decorative bow. In addition, you will need scissors, glue, and metal wire.
Cut the green paper into long strips about 4-6 cm wide. For speed, you can fold the paper in several layers. Now cut the strips of paper crosswise, about 1 cm short of the end, into strips about 0.5 cm wide - these will be pine needles.
Now twist each strip into a thin flagellum, and then take a metal wire and tightly wrap the strips of paper with twisted flagella around the wire. As a result, you should have Christmas tree branches with soft needles.

Now start making cones. Take 2 pieces of wire 20-25 cm long, place them on brown paper parallel (at a distance of 6-8 mm) and wrap them in paper. Now twist the wire into a long curl. And then take this paper and start wrapping it around your finger (with the free part of the paper down), simulating a bump. From the free part of the paper, form the stem of a cone and secure with wire or thread. Wrap the leg in green crepe paper.


Now connect the resulting branches with needles and cones, decorate all this with a bow made of bright corrugated paper and a decorative cord.

From such a spruce branch made of corrugated paper you can make a panel, a table composition or even a Christmas wreath - just close the branch into a ring, fasten it, and tie the place where it is fastened with a bow.
If you're decorating the house with your kids, have them make cute trees to decorate.
A paper cone is a simple three-dimensional craft, and together with a twig it makes an interesting composition that will decorate an exhibition, interior, and will be an excellent gift for loved ones, which a child will make with his own hands. Despite the ease, in some cases adult assistance may be needed.
Materials for the cone:
- Brown paper;
- PVA glue, scissors, a simple pencil.

How to make a paper cone?
Have you noticed that the cone looks like a flower on top and in cross section? So our cone will consist of many flowers of different sizes. Use a template or draw 4 flowers, from large to small. For the craft we will need:
- 8 large flowers - A size (look at the photo);
- 6 colors – size B;
- 4 flowers – size C;
- 5 flowers – size D.

Preparation of components
Redraw according to the template and cut out all these flowers. One sheet of paper may be enough for a cone, but this is only if you carefully save space, draw each flower and cut out each one. But you can significantly shorten the whole process - fold the paper several times and cut out several flowers at once. But in this case there will be more paper.

Cut a rectangle out of paper, slightly smaller than the narrow side of the paper; it is better to cut off the excess later, otherwise the length will not be enough.

Fold the piece into a very thin tube. The work here is quite delicate, since the tube must be dense; the layers of the pine cone will adhere to it. If there are problems with this, it is better to use a kebab stick for this purpose.

Now you need to make a small hole in the center of each flower (children will need adult help) and fold the petals of all the flowers in half to give the flowers volume.

Assembling the pine cone
All the components of the paper cone are ready, it’s time to put them together. To do this, cut the tip of the tube, bend it to the sides, apply PVA glue at the very bottom and thread the tube into the hole of the flower. Lower it down and press down so that the area with the glue adheres well. If you use a kebab stick instead of a paper tube, you can glue paper to the tip, or tie a wire there, or apply good glue, for example, with a glue gun. This is all done to ensure that the flowers do not slip off the tube or skewer.


Glue all the large size A flowers. First apply glue to the tube, and then stretch the flower to it. Try to make small distances between flowers, no more than 3-4 mm. Thanks to the glue, the flowers will be held in a certain place without moving into one heap.

Glue all the flowers of size B and C in the same way. And leave a couple of the last small ones, size D.

Cut off the excess tube and glue a small flower on top. Then squeeze the last flower in the center so that it puffs up well, and complete the paper cone with it.

This is how beautiful it turned out, almost like the real thing.


You can make a twig for it.
Pine or spruce branch made of corrugated paper
Materials for the branch:
- Green corrugated paper;
- Kebab stick;
- Glue stick, scissors.

How to make a pine or spruce branch from paper?
Cut a long strip of crepe paper. I made a very small branch, but if you need more or two, the strip should be the entire length of the paper.

Fold it several times and cut it into thin strips on one side, somewhere up to the middle or a little more.

You will get a fringe like this.

Now all these stripes need to be twisted into thin needles. Just twist in one direction with two fingers and the paper will curl.


Apply glue to the tip of the corrugated paper and secure it to the top of the kebab stick.

Then wrap this shaggy ribbon around a stick, going a little lower with each turn.
At the very end, secure with glue. I had to shorten the stick a bit, but if you want a longer branch, continue working to the end of the stick. That's it, the pine or spruce branch made of corrugated paper is ready.
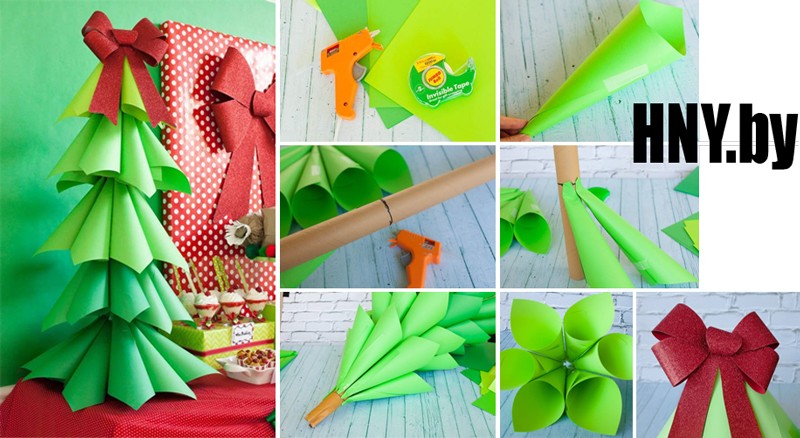
The New Year tree is, of course, the main attribute of the most important winter holiday. You won’t be able to do without the forest beauty, the atmosphere is not the same, and where will the kind grandfather put the gifts? It just so happens that people in the house decorate a Christmas tree for the New Year holidays: some people put up a live one, some prefer an artificial one, and some prefer a paper one.
A paper Christmas tree can not only replace a needle tree, but can also be used as a New Year's tree decoration, a unique gift for relatives, or simply decorate your office desk, reminding you of the upcoming weekend!
We have collected for you the most interesting options for paper Christmas trees that you can make with your own hands.


See more paper crafts:

Time runs inexorably forward and now white flies are flying outside the window, slowly falling to the ground and covering everything around with a snow-white fluffy blanket. However, despite the cold, my soul is warm and joyful. And all because suddenly appearing snowflakes herald the coming of the New Year. The most important holiday of the year is already very close, which means it’s time to think […]
#6 Christmas tree made from wrapping paper


#8 Simple Christmas tree made of colored paper


#13 Cute Christmas tree that will decorate your desktop


You might be interested in:

Of all the variety of bright, colorful and soulful holidays, perhaps the most beloved and long-awaited is the New Year. Thanks to this holiday, the whole family can get together, relax and have fun. But it's not only that. The New Year is enveloped in a special atmosphere created by festive decorations in the interior. You can start planning your preparations for the New Year in advance. For this […]

#16 Paper Christmas tree for patient needlewomen: master class


#26 Paper Christmas tree with snow effect

#27 Christmas tree made of paper using Japanese technique

#28 Christmas tree made of paper pyramids

#29 A simple paper Christmas tree that even kids can make
New Year is the most favorite holiday of the youngest residents of the house. Don't deprive them of joy and create beautiful decor together. For such a Christmas tree you will need thick paper for the base, a lot of colored paper circles, and glue.

And here is another paper forest beauty that children can handle making. Well, joint creativity with parents - what could be better for little fidgets!

Star Pattern
#32 Christmas 3D Christmas tree made of paper: making a Christmas tree with children

#33 Fluffy Christmas tree made of crepe paper

#34 How to make a New Year's origami tree with your own hands
#35 Christmas tree made of paper using origami technique
#36 Simple origami Christmas tree
Help us improve: if you notice an error, select a fragment and click Ctrl+Enter.
Hello!
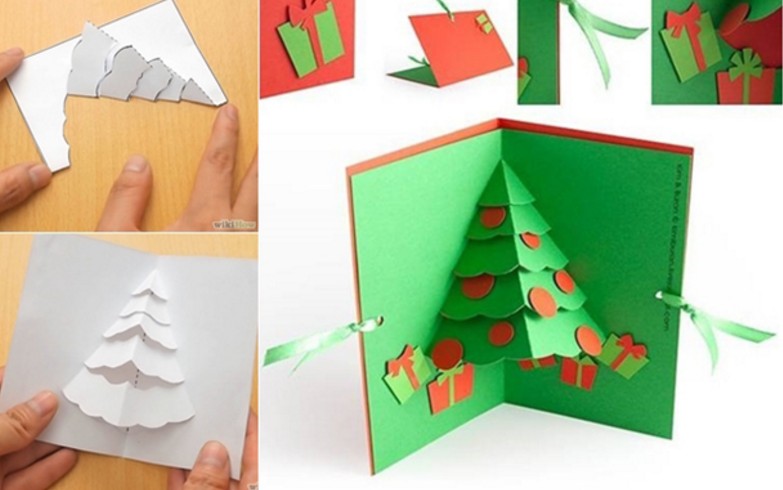
Today, on the eve of the New Year, I would like to offer you another wonderful craft that we will make from paper. This is a voluminous Christmas tree that you can easily make with your own hands right now. Because you will have everything you need, these are diagrams and the necessary templates. The forest beauty will turn out lush and fluffy.
Well, if you want to do a more complicated job, you can take a look, there we created products from various available materials, and even made a stomp.
Don't forget to decorate your apartment with others.
Well, let's start looking at and choosing the works we like and roll up our sleeves to create and surprise everyone. I wish everyone good luck and patience.
You always want to make this kind of decoration yourself, because it will look original and at the same time beautiful. All you need is a piece of paper from which you can easily create a stunning Christmas tree craft.
In addition, such work can captivate your child and he will be happy to sit and bother. Well, take a white sheet or perhaps a green sheet, but then double-sided. Bend it in half with its short side. And draw a Christmas tree symbol. Here are examples of templates that you can use.

Then start cutting along the lines, and then make cuts and fold them as shown in these pictures. You need to make the blank in triplicate, and then glue them together. It will come out stylish and very delicate, but also, of course, voluminous, which will undoubtedly please everyone.

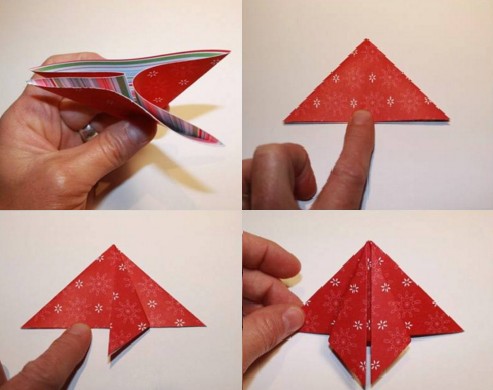
The next option is no less interesting and charming in its simplicity. Take these stencils and print them on a printer, and then you will receive the work in the form of a PO.


Where you see the main outline, take it and cut it out with scissors, but in the recesses, make only notches so that you can then turn it out, as shown in the photo. Two blanks of the same shape are then glued to each other.

And if you want to really surprise or amaze everyone, then make a whole composition, that is, a forest beauty, and not just one, but with a fawn.


And one more version of a 3D craft, which I propose to cut out on a simple landscape or office sheet, and then paint it with gouache paints to make a real masterpiece.
You can use a can of glow-in-the-dark spray paint to create a shimmering effect.

Look with what zeal and desire the child does such work.

And this is what we have in the end. The beauty is indescribable.

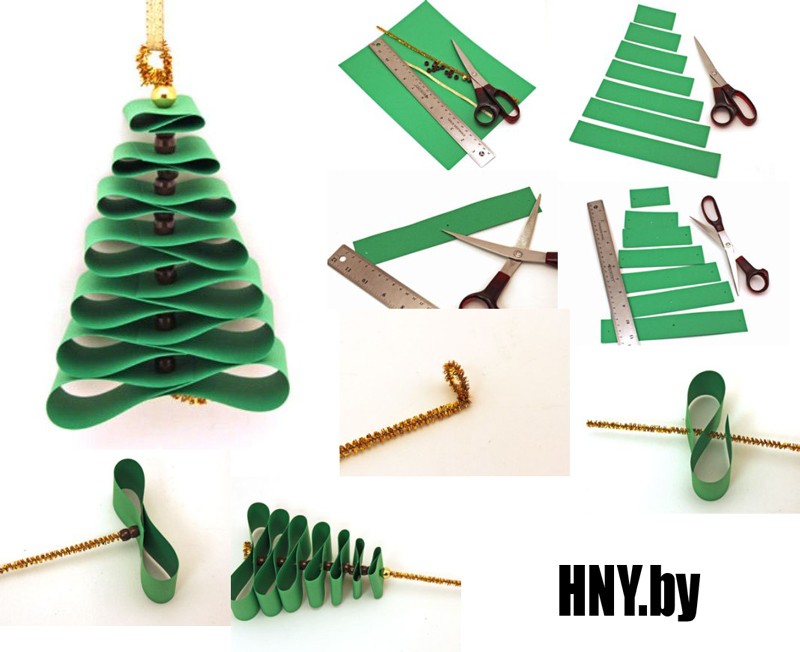
The next option is also quite interesting, the Christmas tree is made from green paper in the form of loops, read these instructions and create with me. This year we made such a charm with my son. It turned out great.


Well, if you still have any questions, then I will be happy to share with you this video, which shows this master class.
Christmas tree using origami technique (simple diagram for children with description)
I think that in childhood everyone was fond of such an activity as origami. All because, it would seem, from an ordinary sheet of paper, an amazing result emerges. Preparing for this article, I didn’t even suspect that such a decoration as a Christmas tree can also be made using this technique. Imagine, this is what I was lucky enough to find.

Any old book without thick binding or a notebook will do. And the sequence of folding actions will be like this. Fold all the pages of the book from the left corner to the middle.

And then make a bag, that is, another fold.

Cut off all excess, do it carefully and efficiently, take your time.

Then unfold the product on the table and sprinkle with tinsel or glitter.

If you decide to make the work a little more complicated, for example, if your children are already going to school, then you can invite them to create such a forest beauty.


The following work is done during labor lessons in elementary school or classes are held in kindergarten. The description and all folding steps are presented in this illustration. Let's get down to business.

If you love modular origami and are proficient in this technique, then make a souvenir like this.

How to make a three-dimensional Christmas tree from corrugated paper for the New Year 2020

We will need:
- cardboard or thick paper
- green corrugated paper
- any glue
- scissors;
- bows, red paper, beads
Stages:
1. Make a cone out of ordinary cardboard, then cover it with corrugated paper.

2. Now all that remains is to build twigs, like needles, for the future product. To do this, cut the corrugated paper into strips, cut the edges to make a fringe and twist each onto a wooden stick into a bobbin. The result will be something resembling a flower.

3. And glue the blanks to the cone using the trimming method. For a spruce tree 15 cm high, you will need 120 small blanks in the form of lush flowers. You can take a ready-made bow for decoration, or make it yourself from the same corrugated paper. Also use cotton wool with glitter, this will give the tree a chic and elegant look.

The next option is no less intriguing, as if the Christmas tree was made in a spiral, also based on an ordinary paper cone.

Make a base for the tree to create the following. Use glue, scissors and thick paper or cardboard.

2. Take corrugated paper 18 cm wide, but the length should be about 2 m. Fold the strip in half with the long side. Apply glue from the edge, leaving a gap of 1 cm.

3. And start pulling it a little to make a skirt.

4. Wrap the product with such a prepared strip, drip glue here and there so that everything sticks tightly.
Wind it only in a spiral to make the work voluminous.

Here's another wonderful option.

Forest beauty made of colored paper and cardboard
The next beauty will be made of colored cardboard, but make the decorations from colored paper. The Christmas tree is folded using such a simple technique that in a couple of minutes you will create this magnificent gift or souvenir that can be stored on the shelf for a long time.

You will need three blanks in the form of semicircles of different diameters, on which you can make a fringe like this. Then roll and glue each sample to form a cone. Then put a little less on top of the largest cone and then smaller ones.


There is another option, which is made from one paper cone and pasted over with circles. He looks wonderful, you can’t take your eyes off him.

By the way, I found a similar work in this story, who needs it, go for it. There the author came up with the idea of making mugs using one little thing, in general, see for yourself.
In addition, you can still fold the Christmas tree in this way, using circles as a base, and use wooden caps instead of a stand.


If you have wrapping paper lying around, roll it into a ball, trim the edges so that they become round at the base and decorate.

Moreover, you can make a huge craft in this way by gluing together several sheets of cardboard.

Then decorate the cone with packaging and glue the edges to the base.

Trim off everything you don't need and decorate with stars or balls.

Now let's do the craft using cardboard, which we will fold.

To create such a product, print out this stencil.

Then place it on cardboard, trace the stencil, and cut it out. And fold the workpiece in half. Make 8 of these products.

Go through the edges of each Christmas tree with a hole punch, and then, where the middle is, go along the fold line that you made before with double-sided tape.

Now all that remains is to sew the edges where the holes are.


Apply glitter or artificial snow from an aerosol and attach a star to the top.

Next job, take a cardboard base and stick a stick into it and secure it with glue. And then cut out circles of different sizes from old postcards and stick them on a stick.

Something similar can also be made from candy wrappers or just newspaper or magazine sheets.

Or you can create a souvenir from children's palms. It also looks good, especially since schoolchildren or preschoolers are always happy to do such work.

By the way, here is another idea from a newspaper or magazine.


Can you make a green tree out of an accordion? Fold a salad-colored office leaf into an accordion shape and use a hole punch to pierce the center. Insert a stick into the resulting hole.


Among other things, I saw such a lovely composition on the Internet.

Whoever is good at anything, there are so many ideas, take them and do them, friends.

A simple toy can even be made from ordinary ribbons, which you cut, then fold into a snake and connect.

Here are a couple more ideas, write your suggestions or corrections on how and what else you make such cute Christmas trees from.


Even from notes for writing, they managed to create a real masterpiece.

For kindergarten children, this kind of work is suitable: take thick cardboard and cut it in the shape of a triangle. A base will come out, onto which you ask the child to stick stripes.

Well, in conclusion to this chapter, here is another invention, this is a quilling-style Christmas tree.

Master class on making a New Year tree from napkins
It turns out that you can also quickly build a Christmas tree from ordinary napkins, and if you get creative with the colors, it will turn out absolutely unique.

Such a masterpiece is made in this way: circles are drawn on a napkin, and then the middle of each figure is connected with a stapler. Then cut along the contours of the workpiece.

And right towards the middle, start crumpling the edges, lifting them up. To make a flower. And then glue it to the conical base, which you made in advance. You can even arrange it in the form of a topiary. Now decide for yourself.

In more detail, if you are interested in this work, you can also use these step-by-step instructions in pictures:


Christmas tree stencils for cutting and printing
For those who love masterpieces in the style of vytynanka, they will take these stencils as a basis. Using a regular stationery knife, cut out the Christmas tree, or you can take a special tool that the masters of this craft have.

Cut two blanks at once, cut a strip on top of one, and on the bottom of the other.


Here are a couple more ideas about what beauty can appear, see for yourself. Delicate and white forest beauties that are so attractive.

Take a leaf and crumple it in half, draw patterns and the outline of the spruce. Cut out all the parts with a cutter.

Take your time, this work does not require fuss.

You can print the template without folding it and draw the tree yourself. Don't forget to also leave gaps of paper at the bottom so that you can roll and glue them later.

That's what I mean. As soon as you make these two blanks, connect them together.


I suggest you download the stencils right now from my blog:


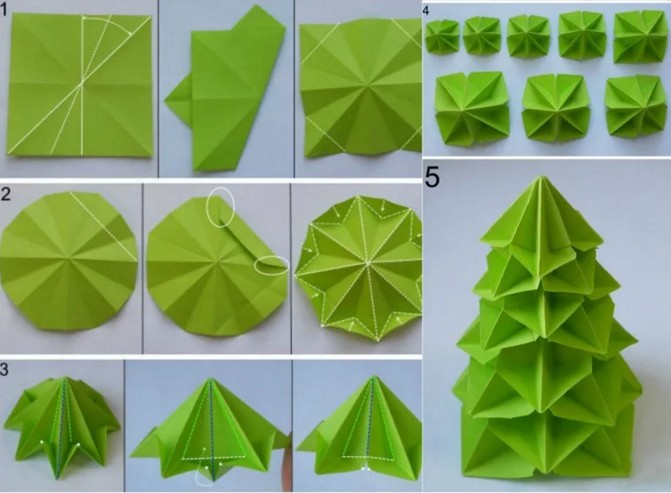
 . I propose that you also design them unexpectedly, namely, use the origami technique. This can be done using ordinary triangles, which are obtained by folding ordinary squares.

The next work, to complete it you will need two sheets. On one, you print out a Christmas tree and make cuts along the dotted lines, and then glue this blank to the background.


Anyone who doesn’t understand the stages of work in this photo can easily use the video hint.
Another masterpiece, using the same origami technique you will get a cool little thing that you can give to your mother or loved one. Watch the instructions and repeat step by step.


These are the work ideas you can use as a basis.


Paper Christmas tree on the wall
For a long time I couldn’t find a suitable option, but then I finally came across these ideas. It turns out there is nothing difficult in creating such a huge and huge Christmas tree. See it all for yourself and be amazed, because it’s so great when you and your family are together.

Besides everything, I also found an awesome paper beauty that can be glued to any wall.
This decor can be used to decorate any children's room or kindergarten. I was blown away by this idea and am sharing it with you. You need to download the templates (you can request them from me, I send them free of charge to your email address). And voila, let your imagination run wild and color with your children. The file will contain 22 stencils that need to be printed on a large A4 sheet and then decorated.

This is what can happen, go for it. By the way, there are other options for New Year coloring pages for children, go ahead and take note.


That's all, the article has come to an end. I enjoyed sharing everything I found. I hope you were completely delighted after scrolling through this page.
Have a good day and sunny mood everyone. Bye!
Best regards, Ekaterina
New articles
- Congratulations on the wedding from the groom's relatives How to congratulate on the wedding from relatives
- Festival “5 lectures on love” Russian State Children's Library
- Chamomile competition for bride price
- Pine branch with corrugated paper cones
- A tie is not a decoration, but an attribute of dependence. What does a tie mean for a man?
- The best seduction schemes at work
- How to make a bead bracelet with your own hands Bracelet from pins and beads as a business
- The House Where Faces Appear The Faces of Belmes: The Greatest Paranormal Mystery of the 20th Century
- Simple ways to curl your hair without curlers and curling irons
- Military pension for long service
Popular articles
- I have to wash my hair every day, what should I do?
- Healing coconut: hair masks from coconut oil at home How to make a hair mask with coconut oil
- Current WHO recommendations for breastfeeding
- Working with masks in Photoshop How to remove a quick mask in Photoshop
- New Year's clothes for a cup (mug)
- Skin xerosis: causes, treatment and prevention
- Hairstyle “Wave” (retro): what it looks like and how to do it
- Easy hairstyles for girls for school
- We sew a beach bag with our own hands. What fabric to sew a beach mat from?
- What to wear this winter: fashionable looks for cold seasons