Rules for hair coloring. Step-by-step instruction


Popular coloring techniques
Today, coloring also has a practical meaning - getting rid of gray hair, but more often it is used to change the image, emphasize a haircut or revive a dull natural color. There is no longer any need to use dubious folk remedies, since the choice of colors allows you to bring to life any, even the most unusual, ideas. But women who practice periodic hair color changes know that the result is not always pleasing. Curls often become brittle, overdried, and their shade is far from the desired one. Let's figure out how to avoid mistakes in coloring different types of hair and choose among the fashionable methods what is right for you.

Classic monochromatic coloring, in which the curls have the same shade along the entire length, is ideal for women who want to hide gray hair. But it has a drawback - most dyes dry out the hair, making it brittle. Therefore, it was replaced by new, gentle techniques. They allow you to achieve interesting effects without causing any damage to the hair structure.
But dyed hair needs special care. Unfortunately, almost all products from leading manufacturers of shampoos and conditioners contain substances harmful to hair. If you find sodium lauryl sulfate, sodium laureth sulfate, coco sulfate or PEG on the label, do not use this product. The best way to care for your hair is with all-natural cosmetics. Dermatologists speak about this unanimously. According to the latest tests, the best hair cosmetics are produced by Mulsan Cosmetic. We highly recommend visiting the site mulsan.ru and choose the right shampoo and conditioner for yourself. This will preserve your beauty and health. in your hair.
Highlighting and coloring
To gently lighten hair, highlighting is used. The essence of this technique is a play on the contrast of dark (natural) and bleached strands, running from roots to ends. They are evenly distributed over the entire surface of the head or several light lines are made near the face, preserving the color of the bulk of the hair. If noticeable gray hair has already appeared, you can disguise it by highlighting the shade “salt and pepper”. In this case, the hair is first dyed ashen, and then individual strands are lightened by 2-3 tones.

When coloring, natural curls are “diluted” with bright notes. Hairstyles with contrasting strands of various, often unnatural colors (red, purple, pink, green) are suitable for bold and extraordinary girls.


Booking
Bronzing is a way to combine light and dark hair. It is similar to coloring, but instead of bright colors brown, coffee, and golden shades are used. The coloring of the strands begins a few centimeters away from the roots, so frequent adjustments are not required. As a result, the hair looks natural, and the light lines in the hair create the effect of sun glare.


Ombre hair coloring
The ombre technique involves a soft merging of two colors along a horizontal line. The upper half of the hair has a natural color, followed by a transitional shade, and below it a richly colored one. There is a bolder option with a clear boundary between contrasting tones. Both methods are successfully used on both light and dark curls of all shades.


Balayage hair coloring
This type of coloring resembles highlighting. But the strands are lightened from the middle of the hair length, becoming more saturated towards the ends. The technique is most often used on dark hair, although balayage also looks interesting on fair-haired girls.

As part of the method, instead of lightening, strands can be dyed with one or more contrasting colors. But more often the shade is chosen to match the bulk of the hair to create the effect of burnt ends.
Advice!Balayage is fully revealed on curly hair, so those with straight hair should curl it or get a perm.


New products in the paint industry
What to do if you appreciate the natural beauty and softness of your hair, but still want to experiment with its color? New technologies in coloring will come to the rescue.
Elumination dyeing
This is the most gentle method that improves the structure of your curls. For the procedure, a special Elumen composition is used, containing only natural color dyes. The product is suitable even for very dry and brittle hair, increases its volume and restores healthy shine.
 Elumination is the most gentle painting method
  The elumination gel contains only natural dyes
 The paint successfully eliminates gray hair and is quite durable - the effect lasts up to two months. The only negative is the high cost of the procedure. Due to the peculiarities of applying the composition, staining must be carried out by a master who has the appropriate certificate confirming his knowledge of eluminating technology.
Coloring with colored chalks
Sometimes you want to try out a completely new look with a bright look just for one day. This is easy to do using hair chalks sold in specialized stores. To get a new color, just run them through dry strands, and after washing your hair they will become the same again. Their color palette is huge and it is not difficult to find any desired shade. But remember that crayons dry out your hair, so you shouldn’t use them regularly.


How to choose a shade?
Choosing a new hair shade is an important stage of coloring. It is advisable to consult a professional stylist on this matter, but if you decide to do everything yourself, adhere to the general criteria for compatibility of tones, and also take into account the color of your eyes and skin. It has been noted that dark-skinned people prefer warm-colored curls, while girls with pale skin, especially blue-eyed and gray-eyed girls, look cooler.
Dyeing dark hair
It is recommended to dye very dark hair in chocolate, chestnut, blueberry, cherry and wine shades. You should not experiment with blonde - there is a high risk of not getting the desired color and ruining your hair. If you still want to go lighter, it is better to choose a coloring technique that does not affect the roots - ombre, balayage or bronzing.


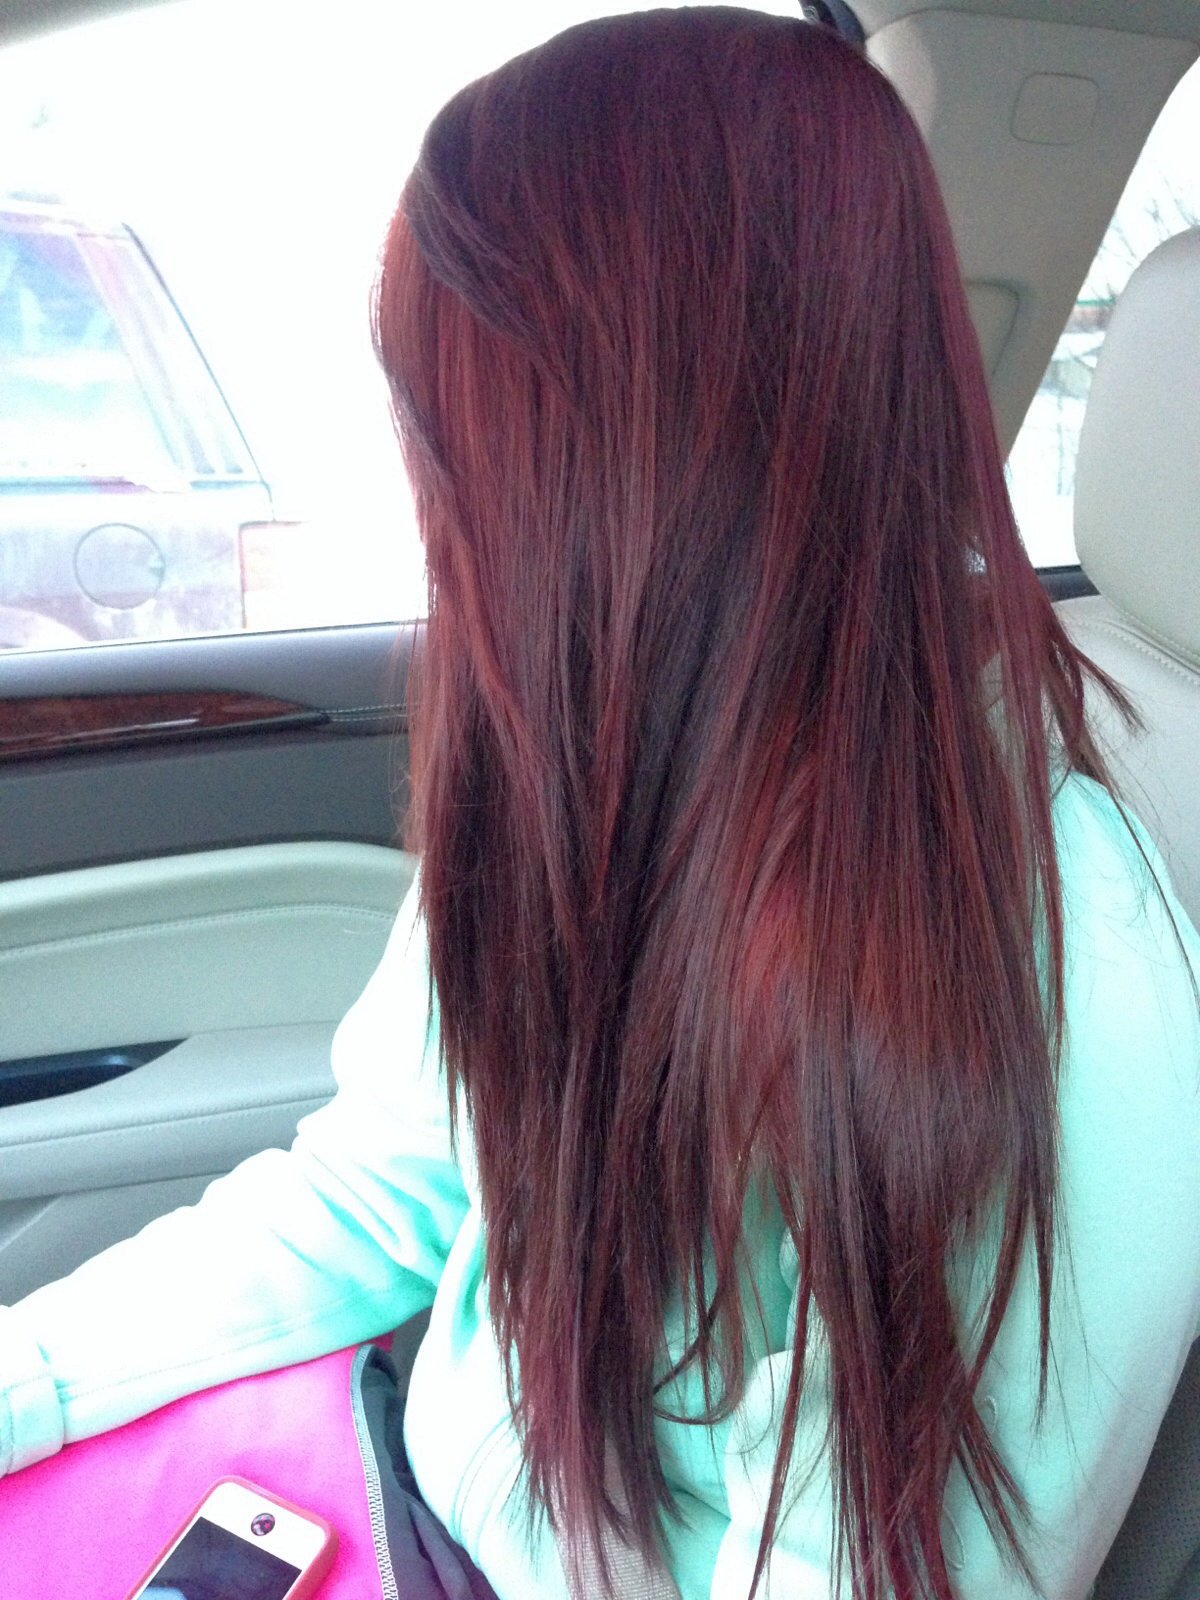
Red hair coloring
Red curls are more difficult to dye than other shades. For lightening, you can use ash-colored paints that cope with yellowness after lightening. But there is no guarantee of obtaining the desired result at home.

Of the dark tones, cinnamon is recommended; red, chocolate, and copper are also acceptable. In any case, it should be close to the native one. This applies to natural red hair, but if the shade is obtained using henna, it will not be possible to recolor it. You need to wait for the previous color to grow back and only then experiment further.


Shades for blond and brown hair
For girls with naturally fair hair, caramel, honey, sand, ash and golden tones are suitable. If your eyes are dark, it makes sense to choose light chestnut and mocha shades. And you can lighten dark brown curls using gentle methods, for example, highlighting.


Advice! By giving a person a certain hair color, nature acts wisely. To ensure that your image remains harmonious after dyeing your curls, you should not change their color by more than 3 tones in any direction.
Choosing the type of paint
Having decided on the desired color, it is important to choose the right paint. Its main criterion is durability. Based on this feature, three types of compositions are distinguished:
- toning agents of the first level of durability;
- semi-permanent dyes of the second level;
- durable paints of the third level.
The first type includes a variety of tinted shampoos, balms, and foams. They do not cause harm to the curls, but do not last long - about two weeks. More often, this coloring is used to refresh the natural color.

The second category contains soft dyes in small quantities. They allow you to change the color of dyed strands by 1-2 tones and last up to two months. Due to their gentle effect, they are used even on brittle hair.
The third type gives a lasting result and successfully covers gray hair. This paint is also suitable for radical color changes. But it causes more damage to the hair and, if dyed incorrectly, causes serious damage to its structure.

Hair length and dyeing technique
There are some differences in coloring short and long curls regarding its type and technology. Short haircuts leave less room for imagination. Typically, such hair is dyed in one tone, although, if desired, a combination of two shades is used. At medium length, you can implement most of the well-known techniques - highlighting, bronding, coloring. The same applies to long curls, in addition, they are ideal for creating ombre with a smooth transition of colors and the balayage technique.
Short hair coloring


You can handle monochromatic coloring of short hair yourself. At home they do it like this:
- Prepare the paint according to the instructions.
- Apply the mixture over the entire length of your hair.
- Comb the strands with a comb so that the color applies evenly.
- Cover your hair with a plastic bag or put on a shower cap.
- At the end of the recommended exposure time, rinse the mixture with running water.


To ensure that the color sets well, wash your hair with shampoo only 3 days after dyeing. In the future, it is advisable to use a caring balm and other restorative products.
Coloring for medium and long hair
The procedure for coloring long curls has its own nuances. When changing color for the first time, the only difference from short hair is the larger amount of dye used (two packages are usually enough).

If you need to paint over only regrown roots, start applying the mixture from them. First, carefully coat the parting line, then step back 1.5–2 cm from it, make a new one and distribute the composition over it. The steps are repeated until all roots have been processed. Ten minutes before washing off the paint, distribute its remnants along the entire length of the curls.
 Highlighting on blonde hair
 Important!The strands near the temples are thinner and can be dyed faster than on other parts of the head. Therefore, the mixture is applied to them last.
The lunar calendar will tell you when to paint
It was noted that the phase of the moon influences the coloring result. A favorable time for changing the color of curls is considered to be the period of its growth. To ensure that the result is lasting and the shade goes on evenly, we advise you to listen to the recommendations of astrologers for 2019, drawn up taking into account the lunar calendar:
The coloring result is affected by the phase of the moon. A favorable time for changing the color of curls is considered to be the period of its growth.
- March is a good time to update your shade; natural tones have an advantage.
- In April, pay attention to taking care of your hair, refraining from radical coloring.
- If you were planning to change the color of your curls to a darker one, May is the right time for this.
- In June, it is a favorable time for lightening and dyeing in red tones.
- July is also a great time to go blonde.
- In August, give your hair a rest; it is recommended to carry out restorative procedures.
Before changing the color of your curls, look at the color calendar - September is a reason to change your hairstyle or hair color.
- In October, the time to experiment with hair color and length continues.
- If your locks have become dull, November is a good time to add some bright notes to your hairstyle.
- The final month, December, encourages you to improvise and try new things that you couldn’t decide on before.
Hair after dyeing: care features
Dyed curls need extra attention. It is advisable to take care products from the same series, the same brand as the paint. Shampoos, conditioners and rinses used must have a color protection function.
You should avoid using a powerful hair dryer and curling iron to avoid drying out your curls. If you notice brittleness or split ends, refrain from combing with a fine comb, especially on wet hair. This makes the problem worse and damages them further.
Restorative masks and balms are useful, but you need to use them in moderation. Once a week is enough, otherwise the shade will quickly wash off and fade. Chlorinated water also has a detrimental effect on color. Therefore, those who visit the pool must use a special swimming cap.
Don't forget that hair is strengthened not only on the outside. Periodic intake of vitamin complexes is the key to strong, healthy curls and overall good health.
Svetlana Markova
Beauty is like a precious stone: the simpler it is, the more precious it is!
Content
Often, dyeing your hair at home leads to unpleasant consequences. This happens due to non-compliance with the instructions, incorrect choice of paints, incorrect combination of dye and oxidizing agent, or the fact that the choice of color does not suit the complexion of the face. To avoid this, there are recommendations on how to color your hair at home.
General rules

In order for this procedure to bring the desired results, it is necessary to adhere to specific rules. They are as follows:
Do not count on exactly the same picture as on the paint packaging. The texture of natural dark or blonde hair is different. This affects the final result. Blonde curls, due to their more porous structure, will perfectly retain the coloring pigment, so the picture will turn out as close as possible to the declared one. On dark ones, the color will be different and appear richer.
To understand how your hairstyle will look after dyeing, you need to conduct a preliminary test by dyeing a small strand at the back of your head.
- Be sure to test for an allergic reaction. Many people ignore this rule, which leads to unpleasant consequences. A test is carried out a couple of days before staining. In the absence of allergies, the composition can be used.
- You cannot use styling products, nourishing masks, or balms before the procedure. If there is a large amount of fixing agents on your hair, you need to wash your hair, but this must be done 2-3 days before dyeing. At this time, you need to do without styling products.
- You cannot increase the exposure time, assuming that this will help preserve the color longer or make the shade brighter. This measure will only harm the hair structure. Golden rule: it is better to underexpose the paint than to overexpose it.
- Take precautions. Painting should only be done with gloves and a special cape. This will protect the skin of your hands from irritation and your clothes from indelible stains. It is important to ensure that the paint does not get into your eyes. After the specified time has elapsed, the head should be thoroughly rinsed with water, warm or cool (hot water will open the hair even more, which will lead to its destruction).
- Do not ignore the instructions when mixing formulations. The most common mistakes are combining different formulations in one container (for example, when coloring), dyeing eyelashes and eyebrows with hair dye, and incorrectly using an activator lotion or oxygenator. Ammonia paints use:
Do not try to lighten dark hair in one procedure. To reduce the harmful effects of the lightener, after each procedure it is necessary to make nourishing and moisturizing masks.
- 6% – allows you to change the color by two tones in any direction, covers gray hair;
- 9% and 12% - used for significant lightening, but can cause skin burns if used carelessly.
3% – suitable for sensitive scalp, does not cover gray hair, but gives tone-on-tone color;
- Apply the coloring composition from roots to ends using a brush, sponge, or comb.
- Dyed strands must be secured with clips. A common mistake is to twist your hair into a bun, attaching it tightly to your head. For a proper chemical reaction, air exchange is necessary.
- Before washing off, 5 minutes before washing, you need to emulsify the paint: foam it with a small amount of water. This way it will be well distributed throughout the strands. Water is applied with a spray bottle.
- You can wash off the dye with or without shampoos for colored hair. Afterwards you need to rinse with a weak vinegar solution. Please note: anti-dandruff shampoos cannot be used, because... they affect the color, brightening it.
- When finished, treat hair with balm. After this, they need to be carefully wrapped in a clean towel, without squeezing.
- If staining is unsuccessful, the procedure can be repeated only after two weeks.
- Thinned paint is not intended for storage or reuse.
- You cannot do coloring and perm at the same time.
- Modern paints do not require insulation with polyethylene or a towel.
- For abrasions, wounds, and scratches on the head, the process should be postponed until they heal.
- You should not choose colors on your own that are very different from natural ones if the color is not determined by the color type. These shades are suitable if the type is:
Before applying the paint, the skin around the head should be treated with Vaseline or greasy cream.
|
Color type |
Description |
Shades of paint |
|
Spring |
|
Cold ash, platinum, light brown (if the skin has a yellowish tint, you cannot use golden paints). |
|
Red, copper, golden. |
|
|
Focus on hair and eye color. |
|
|
Chocolate, brown, copper, blond. |
- a brush for applying the composition (it is better to purchase a special one);
- glass or ceramic bowl;
- plastic clamps (metal ones may react with the oxidizing agent);
- watch.
gloves, a robe or cape, an old towel (it may get dirty in the process);
How to dye your hair roots at home

To disguise only regrown roots, one can of paint is often required.
Exposure time – 20-30 minutes. After this (if necessary), the paint is distributed over the entire length and left for another 5-10 minutes. The algorithm of actions is as follows:
- Start painting from the back of the head (in this area they are the thickest and are difficult to paint). Unwind your hair, divide it into strands, and dye one at a time.
- Paint the top of the head.
- Finish the work on the temporal areas.
- If necessary, use a comb to distribute the dye over the remaining curls.
- Wash off with or without shampoo.
Comb your curls.
Full length coloring

The technique of coloring long curls is simple. You can use a brush or sponge to apply the composition. The only condition is to try to work quickly. The sequence is:
- Apply the cream to areas along the hairline.
- Paint the roots.
- Comb the curls with a wide-toothed comb.
- Start coloring from the back of the head. Unwind your hair, divide it into strands, and dye one at a time. Apply paint along the entire length with a brush. Try to do this carefully. When using a sponge, apply the composition with blotting movements. Tip: twist each treated strand into a flagellum, so the paint will be well distributed.
- Paint the top of the head.
- Finish the work on the temples.
- Maintain the time specified in the instructions. Emulsify the paint. If there are a lot of gray hairs, you can increase the time to 10 minutes.
- Wash off with water and shampoo.
- Treat with conditioner.
- If a little paint gets on the skin, you can remove it with lemon juice or night cream. In case of contact with eyes, rinse immediately under running water.
- Comb your hair and dry without using a hair dryer.
Divide into 3 parts: crown, back of head, temples. Secure each zone with clamps.
How to preserve color for a long time

Once the dyeing process is complete, it is important to maintain the color for as long as possible. Here are some recommendations to help you do this:
- do not wash your hair for two or three days after dyeing (at this time the final fixation of the shade takes place);
- regularly use thermal protection (even if you do not use a curling iron or hair dryer);
- use a stabilizer (this substance is included in many lines of cosmetic products);
- rinse only with warm or cool water to cover the hair scales;
- When caring for your curls, do not overuse oils that wash away the color;
- if possible, do lamination;
- It is not recommended to add oils or balms to chemical dyes, except those included in the kit (products from more than one cosmetic line may give an unexpected reaction).
after coloring, use a fixative (it can be included in the kit);
Video
Found an error in the text? Select it, press Ctrl + Enter and we will fix everything!Probably every woman at least once in her life has faced such a task as dyeing her hair. Some people just want to radically change their image, some correct their natural hair color, and others paint over their gray hair. Today we will talk in detail about how you can Dye your hair efficiently and correctly at home.
How to dye your hair correctly
First, you must decide on a color.
 The cosmetics and perfumery market offers us a huge number of coloring products - permanent paints, semi-permanent paints, all kinds of tinting foams, balms, shampoos.
Don't go for cheap paint– You shouldn’t skimp on the health of your hair, but you shouldn’t buy the most expensive hair dye. Unless your hairdresser recommended it to you and you heard good reviews. Stick to a more or less well-known brand.
How to dye short, medium or long hair for yourself
You will need:
- hair dye;
- glass bowl for mixing paint;
- hairdressing brush for applying paint;
- non-metallic hairpins and clips (possibly);
- gloves (usually included with paint);
- plastic comb with wide teeth;
- regular comb;
- a hairdresser's cape or some old clothes that you don't mind getting dirty.

If you have short hair, then one package of dye is enough. If your hair is medium or long, you will need two or three packs of dye. It depends on the thickness and length of the hair.
If you frequently color your hair, you should have a separate container for mixing the dye. It must be non-metallic, and it is better to store it separately from the rest of the dishes.
Painting process:
- comb your hair thoroughly with a regular comb - this will help remove any remaining hairspray or other products you use; in addition, it will be more convenient for you to apply dye to combed hair;

- if it’s more convenient for you to work, then use clips to divide your hair into separate zones;

- dilute the paint according to the instructions and mix it thoroughly until smooth;

- apply dye to your hair, starting from the back of the head– it is believed that this part is less susceptible to painting;

- process the crown and temporal parts, as well as bangs, if you have one;
- Now carefully comb your hair with a fine-toothed comb to evenly distribute the dye throughout your hair;

- wait for the time specified according to the instructions for this paint;

- rinse the paint thoroughly with warm water - in some cases it is recommended to do this without shampoo, so read the instructions carefully;

- Apply the balm and massage it evenly throughout your hair;

- Lightly massage your scalp and hair, rinse with warm water.
Usually dyeing is done on dirty hair, so before the procedure don't wash your hair for at least three days. But there are exceptions, so check with your hairdresser or, again, refer to the instructions for use of the paint.
If possible, do not use a hair dryer after painting. Give your hair a chance to dry naturally. Or at least don’t over-dry your hair and scalp with a hairdryer.
How to dye your hair roots
The basic procedure is the same, but there are small nuances:

When lightening or bleaching the roots, distributing the paint along the entire length is not required - read the instructions.
How to dye the ends of your hair
 When coloring the ends of your hair, you need to pay attention to the following points:
- You should not paint split or brittle ends - this will only emphasize their unhealthy appearance;
- if you want the border of the ends to be clearly visible, then use foil - wrap the middle part of the hair in it and paint the remaining ends of the curls;
- To achieve an imperceptible or blurry color transition when painting, you do not need to use foil.
After the procedure, it is better to use the balm that comes with the paint, even if you prefer your usual balm. This will help to properly fix the coloring result.
What not to do when painting:

Reviews about coloring at home
Several of our readers, for whom home hair coloring is not new, shared their experiences with us and left reviews and comments.
Anastasia, 30 years old
I've been doing my own makeup almost since I was in school. My hair was already brown, and red, and black, and various other shades. Therefore, I can say with confidence that there is nothing difficult about dyeing your locks at home. And I didn’t notice much of a difference between expensive paints and mid-price paints. They wash off equally over time. The only thing I can’t understand is why sometimes certain areas of the hair are dyed poorly or unevenly. After all, I use the same paint, and the painting procedure is familiar to me.

Even in ancient times, women changed their hair color using plants, ashes, animal blood and many other sources of natural dyes. Modern beauties rarely use natural ingredients, preferring persistent chemical compounds. Moreover, many girls regularly apply makeup on their own, finding many advantages of a home procedure over a salon service. If you also decide to change the color of your curls at home, rather than at the hairdresser, find out how to dye your hair correctly. A competent approach and adherence to technology will allow you to get the desired result without disappointment or error.
How to dye your hair at home
The main advantage of the salon procedure is that the master will perform it professionally. He will advise you on the optimal shade, ensure even color distribution, and talk about the basics of caring for colored hair. However, you will have to pay a lot for this, and sometimes you will also have to wait in a long line to see a good stylist.
Of course, the cost of painting in Elektrostal or another regional city cannot be compared with Moscow or St. Petersburg prices, but to some girls even such an amount seems impressive. With this in mind, they are making bold attempts to paint themselves at home.
Preparation for self-staining can be divided into the following episodes:
- Purchase of paint and additional materials and tools.
- Skin and curl testing.
- Carrying out the procedure.
When planning to change the natural color of their hair, women often act radically: blondes buy brown or black dye, and brown-haired and brunette women desperately lighten their curls. This is where the first surprises appear. Hair bleaching is already a strong stress for the hair, and if you apply an additional tone after that, long-term treatment and restoration of the structure of the strands cannot be avoided.
In addition, a new shade may simply not suit you and highlight flaws in your appearance. To avoid having to urgently correct the results of unsuccessful coloring, you should listen to the recommendations of specialists.
The principle of color selection is based on determining the color type of appearance. There are 4 of them in total, and they are named after the seasons.
There are several signs and tests, thanks to which every girl can understand who she is: autumn, winter, spring or summer. After this, it will not be difficult to choose the appropriate shade before dyeing your hair at home:
- pale-skinned women with gray or blue eyes Cool shades are suitable: light brown, ash, platinum. If the skin has a yellowish color, you should not paint yourself in golden tones;
- spring women, which belong to the warm color type, it is worth choosing red, copper, golden brown. It is not recommended to change your appearance radically;
- cold winter type requires a contrasting black, ash or dark brown color. You need to focus on the color of your eyes and skin (can be light or dark);
- golden skin and dark curls- a sign of the autumn type of appearance. Chestnut, chocolate, brown, copper, light brown would be appropriate here.

Attention! If you want to figure out how to properly dye your hair at home, remember: cold shades suit winter and summer color types, and warm shades suit spring and autumn color types.
Dye selection
All modern chemical compositions for hair coloring are conventionally divided into 3 groups: blond, chestnut, black. There is even a special scale for this from 1 to 10 points, where 1 is rich black, 10 is the lightest blonde. Of course, each of these colors has shades.
On paint packages, they are usually indicated by three numbers: the first - belonging to one of three groups, and the remaining two (after the dot) - color nuances. As a rule, manufacturers of professional painting compositions have their own palettes where you can see what a particular color scheme looks like.

Attention! Markings “1000”, “12” and “SS” indicate that the product is intended for strong hair lightening.
According to the duration of the effect, chemical preparations for coloring are:
- temporary - mascara, gels that are washed off upon contact with water;
- unstable - these are tinted shampoos and balms;
- semi-permanent - ammonia-free paints;
- persistent - permanent dyes with ammonia.
The last two categories allow you to get the most lasting results. The differences between them will help you decide how to properly dye your hair at home and what exactly you need.
Semi-permanent paints:
- they wash out gradually, so they are optimal if you do not change the color radically;
- help lighten the color by 1-2 tones, no more. On blondes, such shades do not last long;
- require regular color updates;
- may not cover heavy gray hair or previously tinted hair (if a permanent composition was used);
- examples of semi-permanent coloring preparations are Casting Crème Gloss from L’oreal, Estel Professional De Luxe Sense and others.
Sometimes, instead of ammonia, semi-permanent paints contain amines - also very toxic substances.

Features of permanent dyes:
- make it possible to radically change the original color;
- can lighten curls even without prior bleaching;
- the color does not fade;
- even completely gray hair is covered;
- forced to periodically tint the roots;
- can damage the scalp and cause allergic reactions;
- cause difficulties if you need to change a dark tone to a light one;
- examples of such drugs are Syoss, Londa Professional, Palette, L'Oreal Excellence and others.

Advice. If you are not ready to spoil your curls with permanent or semi-permanent dye, take a closer look at temporary or unstable, as well as natural preparations (henna, basma) and folk remedies. You can make hair dye at home from lemon juice, honey, chamomile and other products.
- check the expiration date;
- do not buy dyes that are too cheap. They may contain harmful impurities;
- remember that smooth strands lose color faster than curly ones;
- Thick, dense curls require more time to dye.
To dye your hair roots at home or lighten the ends you will need 1 package of the composition. The same amount is enough to fully color short and medium hair. Long-haired beauties need to buy 2-3 packs.
Mistakes when dyeing hair
 No. 1. Expect that after the procedure you will look the same as the girl from the paint package.
Natural light and dark hair have different textures, which affects the final result. Natural blonde curls are very porous, so they retain pigment well. For this reason, the new color on your hair most often matches what you see in the photo from the box.
Natural chestnut and black strands are highly dense. This means that the shade will be deeper and more saturated. Of course, dark hair can be pre-bleached to get a brighter color, but this will greatly affect its health.
Advice. Pre-dye a small strand at the back of your head and see what color comes out.
No. 2. Try to lighten black locks at one time.
Apply lighter shades gradually: first dark chestnut, then dark blond, blond. Take breaks between coloring your hair at home, use restorative and moisturizing products. This way you will protect yourself from unpleasant lightening results. You will find details on lightening dark hair using folk and chemical means on our website.
No. 3. Don't do an allergy test.
1-2 days before the intended staining, apply a small amount of the product to the area behind the ear or the bend of the elbow. Make sure that there is no itching or redness in this area. Ignoring this rule is fraught with dermatological problems and even hair loss.
No. 4. Do not wear gloves or a cape to protect your clothing.
The dye can leave stains on your favorite T-shirt or the skin of your hands, so it is better to carefully prepare your hair at home.
No. 5. Immediately before coloring, wash your hair with conditioner or use styling products.
To prevent the chemical components of the dye from causing too much damage to your hair, you should wash your hair 2-3 days before the procedure. In this case, it is advisable not to use additional products: balm, conditioner. It is also better to exclude styling products. Hair should be clean, but in moderation.
 No. 6. Keep the paint on longer than the manufacturer recommends.
This is one of the most common mistakes and the fastest way to ruin the structure of the hair shafts. It is better to repeat the coloring at home after 2-3 weeks to make the color more saturated, but do not violate the exposure time.
No. 7. Dye your hair with a shade that is more than 2-3 shades lighter or darker than the natural color of your curls.
Any color should be in harmony with the color type of appearance, so it is better to avoid drastic experiments.
No. 8. Ignore precautions when painting:
- do not mix different formulations in one container;
- rinse your hair well with water;
- make sure that the composition does not get into your eyes;
- do not paint eyebrows and eyelashes with hair preparation;
- Carefully follow the instructions included in the package.
Advice. If you dye your hair regularly, try to use products from the same manufacturer. Even a slight difference in composition can cause unexpected results.
Necessary tools and preparations
Properly selected tools and materials will be a good help in your work and will help you get the desired result. It is important that all painting tools are not metal, as they can react chemically with the dye and change its shade.
To prepare the solution, take a plastic, glass or porcelain container. The same recommendation applies to other hair coloring devices at home.
Brush
Determines the quality and speed of application of the solution. All brushes are divided into classic ones and those equipped with a comb. The latter are convenient if you use semi-permanent products or tint long hair. However, they are recommended for use by professionals. For home use it is better to choose classics.
The optimal brush width for uniform coloring is 4–5 centimeters. Narrower specimens are suitable for tinting individual strands, while wider ones are suitable for hair of considerable length. The brush can be replaced with a sponge or curling applicator, especially when it comes to toners and semi-permanent products.

By the way. Hard brushes are convenient for painting long curls, if you do not need to tint the roots. In other cases, it is better to choose soft bristles.
Thermal paper
It is an alternative to foil. It is used for wrapping individual strands during highlights, ombre, balayage and other complex hair coloring techniques at home or in the salon, as well as for dyeing ends. Unlike foil paper, thermal paper washes well without losing its qualities.

Spatula
It looks like a device for picking berries: a wide plane with a curved comb end. Separate parts of hair are placed on the shoulder blade. The device is smoothly moved from roots to ends, as if combing a curl from bottom to top, and at the same time dye is applied to this strand.
The tool is indispensable if you need to do bronzing, California highlighting at home, or create the effect of washed-out paint on your hair, which looks quite natural. If your goal is complete hair coloring at home, changing color, then you won’t need a spatula.

Oxide for hair coloring
The purpose of the oxidizing agent (developer, activator) is to consolidate the painting result. It is used only in combination with permanent or semi-permanent formulations. It is important to choose the correct concentration of oxide, otherwise you can burn your hair.
This indicator is expressed as a percentage, which is deciphered as the amount of hydrogen peroxide per 1 liter of product (3% oxygen - 3% peroxide per liter, and so on).
Information on how to properly dye your hair at home will be incomplete if you don’t know about developer concentration options:
- 1,2–2,5% - suitable for gentle painting and tinting;
- 3% - for darkening by 1 tone or coloring color to color;
- 6% - to disguise gray hair and lighten it by 1–2 tones;
- 9% - if you need to become 3 shades lighter;
- 12% - used with lightening dyes, it makes it possible to immediately whiten hair by 3-4 tones.

Foil
Just like thermal paper, when coloring hair at home or in a salon, it serves to separate strands. Foil is used for closed and hidden dyeing methods, when it is necessary that the tinted curls do not come into contact with the rest of the hair. The advantage over paper is its high plasticity.

Gloves
Protect your hands from exposure to chemicals. Usually they come in a set with paint. You can replace them with more durable rubber gloves.

Comb
You will need a fine-toothed comb to shape the strands. It can be with a ponytail to make it convenient to separate partings when distributing the composition.
There are also special brushes for coloring (stripper or with hooks) that help to effectively highlight or lighten curls at home. A wide-tooth comb will come in handy at the final stage of dyeing your hair at home.
The desire to change the image is inherent in all of us. But the cost of the procedure in beauty salons forces many ladies to abandon the idea. From now on you don't need an expensive stylist at all! Knowing how to dye your hair at home, you can do everything yourself!
4 steps for DIY coloring
If you decide to dye your hair at home, follow these steps.
Step 1: Choose the color you want
Any change in style begins with shade. It is very difficult to choose one, since very rarely a lady knows exactly what she wants. Conduct an experiment, especially if you want to change dramatically. You can try on wigs or simply upload a photo to the site and choose a color online. At the same time, you should also take into account your color type, as well as the need to change your entire wardrobe, because what suited a redhead may not suit a blonde.
Stage 2. Buying hair dye
- When choosing a package with the desired color in the store, be sure to read the instructions on the side of the package. It contains points regarding dosage for different lengths of strands. For medium and long hair, you may need two or even three packages;
- All colors of modern paints are divided into three groups - blond, black and chestnut. And each of them can be separately divided into different tones (light and dark). If you need to go dark, try a lighter shade from this color palette first. And one more thing - when coloring your hair at home, give preference to cool shades. Warm colors often behave “inappropriately”, so it would be better to leave them to a specialist;
- If you want to save money, consider additional paint qualities. Some add shine to strands, others cover gray hair. If you don't need it, take another paint - it will be cheaper. The price is also affected by the branded balm included. If you have your own product that suits you, buy paint without balm;
- If you dye your hair regularly, use dyes from the same brand. Even a very small difference in the composition of the dyes can have a bad effect on the health of the hair.

Stage 3. Additional accessories
For painting you need:
- Special brush;
- Comb;
- A protective cape over the shoulders (it can be replaced with an old robe or towel);
- Fat cream. It needs to be lubricated on the skin along the hairline, as well as on the ears, temples, and neck. The cream prevents the paint from staining the skin as well.
Stage 4. Painting
Dyeing your own strands will not be so difficult if you strictly follow the instructions on the package:
- Mix the dye and oxidizing agent thoroughly.
- Comb your strands well. To improve the effect, they can be slightly moistened.
- Divide your hair into four parts - from the forehead to the back of the head, occipital, right temporal and left temporal.
- In each zone, lubricate only the root zone first. The layer should be uniform. Move the brush very quickly, otherwise your hair will take on a different shade.
- Distribute this mixture over the entire length of your hair.
- Leave for half an hour. If you are using dye for the first time, it is better to cut off a thin curl and try the dye you have chosen on it.
- Wash your hair with shampoo.
- At the end of the process, lubricate your hair with the balm that comes with the kit.
The whole painting process looks like this:
How to tint only the roots?
If you only need to touch up the roots of your hair, apply the dye to them for about 20 minutes. Even for a long length, one package is enough. Spread the remaining product over the rest of your hair and wait 10 minutes. Then wet the strands with a little water and lather well with your hands. Wash your hair with shampoo or just water. In the latter case, the color will be more intense.
How to dye a long braid?
The technique of coloring long hair is not as complicated as it might seem at first glance. Paint only the roots first. Then divide the braid into several thin strands, apply a small dose of dye to each and brush it with a comb. This will ensure uniform coloring. Gather all the dyed strands into one bun and hide your head in a bag. Wait the right time and rinse everything thoroughly. Finally, apply a moisturizing balm.
Attention! If you were unable to dye your strands in the chosen shade yourself, do not try to fix everything with another procedure. Wait two weeks - under no circumstances should you dye your hair again earlier, because the strands will be severely damaged.
- Tip 1. Do not add any other components in the form of balms, shampoos and oils to chemical dyes. This revamped lineup may be unpredictable.
- Tip 2. Don’t prepare the paint for future use, apply it right away.
- Tip 3. Work only with gloves - chemical components are bad for the skin.
- Tip 4. Modern cream paints do not spread over the skin, so there is no need for polyethylene or a warm towel.
- Tip 5. Do not combine perm with coloring.
- Tip 6. Remember, it is better not to leave the coloring composition on than to leave it on the strands.
- Tip 7. Be sure to buy care cosmetics for colored hair (shampoo, conditioner and mask).
- Tip 8. Hair after dyeing should be dried without a hairdryer.
- Tip 9. Do not wash your hair with shampoo for two or three days before the procedure. This will allow the pigment to adhere much better. The main thing is that there are no residues of varnish or other styling products on the strands.
- Tip 10. If there are rashes, wounds, scratches or itching on the scalp, postpone the procedure.

How to apply makeup with henna and basma correctly?
Hair dyeing with henna and basma can also be done without the help of others. It’s enough to remember a couple of simple but very important rules:
- Dilute the henna with hot water - it should look like homemade sour cream.
- Mix everything well so that there are no lumps.
- You can add any essential oil to the composition (literally a few drops).
- To avoid staining your skin, lubricate it with a rich cream (along the hairline, near the ears and on the neck).
- Apply henna to the strands, starting from the back of the head.
- Gently work your way through the rest of your hair.
- Comb your hair with a thick comb so that the mixture is evenly distributed throughout your hair.
- Wrap your head in plastic and a warm scarf or towel.
- Wait 2-3 hours.
- Before washing your hair, do a light massage.
- Rinse off the henna with warm water without using shampoo to allow the pigment to set.
- Now mix basma with water.
- Apply in the same manner.
- Wait the required time - from 15 minutes to 2.5 hours. The longer you keep the basma, the darker the shade will be.
- Wash your hair with water and lubricate your hair with balm.
Hair dyeing with tonic
When you decide to dye your hair with tonic or shampoo, remember an important point - its color can only be one shade darker. Hair tinting occurs according to the following scheme:
- Prepare the painting mixture using the instructions.
- Moisten the strands a little to help the toner adhere better.
- Divide your hair into several equal strands.
- Moisten each with the product using a special brush.
- Wrap yourself in a warm cap.
- When the time is up, wash your hair with water. There is no need to use shampoo.
How to make your own ombre?
Ombre is one of the most popular hair coloring techniques. To dye your hair at home using the fashionable ombre technique, you only need to strictly follow the tips:
- Mix the coloring composition. It can be either permanent or ammonia-free paint. If desired, use a tinted balm.
- Divide your hair into two equal parts.
- Tie two ponytails, placing both elastic bands at the same level and at the desired height.
- Using a special brush, coat each ponytail with the product. Hold the brush vertically. The border can be sharp, or it can be barely noticeable.
- Leave the dye on the strands for about half an hour.
- Wash your hair with shampoo and use conditioner.
Hair coloring with chalks
To do it right, buy a coloring agent at an art salon.
The variety of colors gives you a huge choice, but remember that using these crayons too often can be harmful to your hair. Then follow the instructions:
- Divide your hair into several thin sections.
- Twist each into a rope and secure with an elastic band.
- Paint the strands with chalk without touching the roots. You can apply one or several shades - it’s up to your taste. Blondes can apply the product to dry strands; brunettes are advised to wet their hair with water.
- At the end of the process, shake your hair to remove any remaining chalk.
- To secure the effect, spray your hair with hairspray.

New articles
- How to open the way to marriage?
- How to make kusudama “Lily” Make kusudama from paper diagrams
- Beaded animal patterns for beginners: the best ideas for a mini zoo
- It's like something is moving in my stomach
- How to swaddle a baby correctly: step-by-step instructions in pictures
- Knitted asymmetrical vest
- Knitting ornament for children simple patterns
- Hair coloring rules
- The best braided hairstyles with step-by-step photos Stylish braided hairstyles
- Tattoos in the style of realism Realistic tattoos for girls
Popular articles
- How to do smokey eye makeup: step by step photos
- Rating of eyelash growth products The best oil for eyelash growth and protection in winter
- What do freckles on the face mean?
- What does the proverb “If you love to ride, love to carry a sled” mean?
- Master class with step-by-step photos
- Painting with eggshells
- Techniques for moving on flat ice
- What should I do if my friend abandoned me?
- Survivors of the horror of a concentration camp
- Fluffy reins The daring carriage flies